Are you ready to hit the road on your two-wheeler but struggling with finding the perfect bike fit? You’re not alone! Achieving a comfortable and efficient bike fit can be a challenge, but with the right guidance and techniques, it’s definitely possible to do so in just three weeks. In this comprehensive guide, we’ll explore the tips and tricks to help you get the perfect bike fit in a short amount of time. So, buckle up and get ready to ride with confidence!
Setting Realistic Goals for Bike Fit Improvement
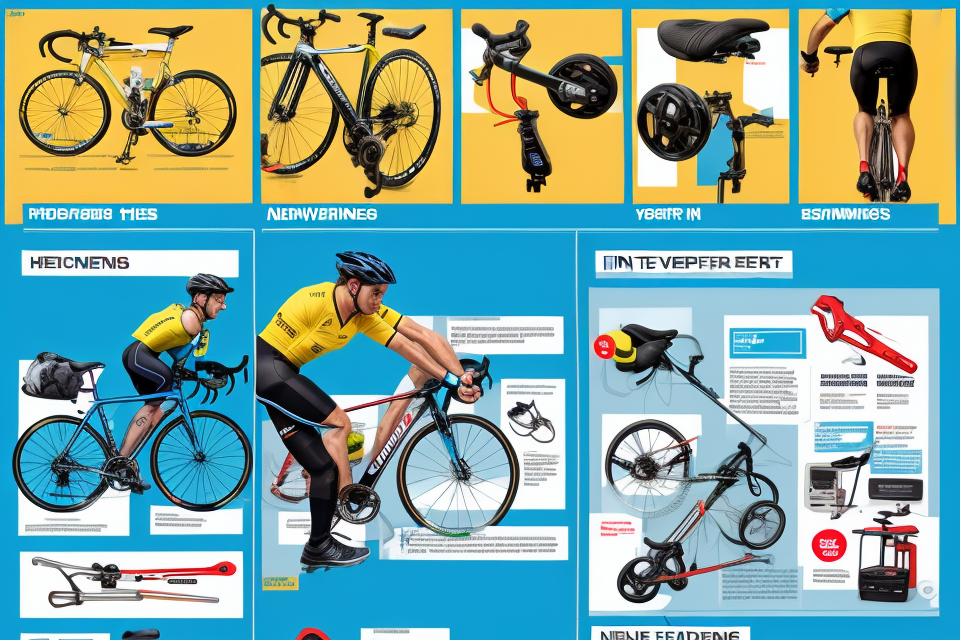
Assessing Your Current Bike Fit
Assessing your current bike fit is a crucial step in achieving a perfect bike fit in just three weeks. This step involves identifying areas of discomfort, measuring your body measurements, and taking note of your riding position.
Identifying Areas of Discomfort
The first step in assessing your current bike fit is to identify areas of discomfort. These areas could include pressure points on your hands, numbness in your feet, or pain in your back or neck. It is important to note down these areas of discomfort as they will be used to guide the bike fit improvement process.
Measuring Your Body Measurements
The second step in assessing your current bike fit is to measure your body measurements. This involves measuring your inseam, saddle height, and reach to the handlebars. These measurements will help to determine the appropriate bike size and position for your body.
Taking Note of Your Riding Position
The third step in assessing your current bike fit is to take note of your riding position. This involves paying attention to your body position on the bike, including your handlebar grip, seat angle, and pedal position. This information will be used to determine if any adjustments need to be made to your bike fit.
By following these steps to assess your current bike fit, you will have a better understanding of your body measurements and riding position, which will help guide the bike fit improvement process.
Setting Specific and Measurable Goals
Goal setting is a crucial step in achieving a perfect bike fit. However, it is important to set realistic goals that are specific and measurable. By doing so, you can track your progress and stay motivated throughout the process.
A goal setting framework is a systematic approach to defining and achieving goals. It typically involves the following steps:
- Identify your goals: Determine what you want to achieve in terms of bike fit improvement.
- Specify your goals: Make your goals specific and measurable. This will help you track your progress and stay motivated.
- Develop an action plan: Create a plan to achieve your goals, including the steps you need to take and the resources you need.
- Monitor your progress: Track your progress and make adjustments as necessary.
- Evaluate your results: Assess the outcome of your goal achievement and reflect on what worked and what didn’t.
When setting specific and measurable goals, it is important to consider the SMART criteria. SMART stands for Specific, Measurable, Achievable, Relevant, and Time-bound.
- Specific: Your goals should be clearly defined and focused.
- Measurable: You should be able to measure your progress towards your goals.
- Achievable: Your goals should be realistic and achievable within the timeframe you have set.
- Relevant: Your goals should be relevant to your overall objective of achieving a perfect bike fit.
- Time-bound: You should set a deadline for achieving your goals.
Examples of specific and measurable goals include:
- Improving your saddle height by 1cm within the next 3 weeks.
- Reducing your seat angle by 2 degrees within the next 4 weeks.
- Increasing your cadence by 10 rpm per minute within the next 2 weeks.
By setting specific and measurable goals, you can create a roadmap to achieving a perfect bike fit in just 3 weeks.
Creating a Timeline for Bike Fit Improvement
Importance of setting a timeline
Creating a timeline for bike fit improvement is crucial as it provides a clear roadmap of the progress that one aims to achieve. This helps in keeping track of the goals set and the milestones reached during the fit improvement journey. A timeline also serves as a motivation tool, helping cyclists stay focused and committed to their fit improvement plan.
Tips for creating a timeline
To create an effective timeline for bike fit improvement, cyclists should consider the following tips:
- Be specific: Define the goals and the steps needed to achieve them in detail.
- Be realistic: Set achievable goals that are challenging but not impossible to reach.
- Be flexible: Allow room for adjustments and modifications as progress is made.
- Be consistent: Schedule regular bike fit improvement sessions and stick to the plan.
Sample timeline for bike fit improvement
Here is a sample timeline for bike fit improvement:
Week 1:
- Conduct a bike fit assessment to identify areas of improvement.
- Set specific and measurable goals based on the assessment results.
- Research and gather information on the best bike fit techniques and exercises.
Week 2:
- Begin implementing the bike fit improvement plan.
- Start with basic exercises and techniques to build a strong foundation.
- Monitor progress and make adjustments as necessary.
Week 3:
- Continue with the bike fit improvement plan.
- Incorporate more advanced exercises and techniques to further improve fit.
- Evaluate progress and celebrate achievements.
By following this timeline, cyclists can achieve a perfect bike fit in just three weeks. Remember, consistency and commitment are key to achieving success in any fit improvement journey.
Developing a Customized Training Plan
Assessing Your Fitness Level and Skills
Fitness Assessment Techniques
When it comes to assessing your fitness level, there are several techniques that you can use. One common method is to measure your heart rate during exercise. This can be done by wearing a heart rate monitor or by taking your pulse manually. By measuring your heart rate, you can determine your maximum heart rate (MHR), which is the highest number of beats per minute that your heart can achieve during exercise. This number can then be used to calculate your target heart rate range for different intensities of exercise.
Another fitness assessment technique is to measure your VO2 max, which is the maximum amount of oxygen that your body can use during exercise. This can be done through a variety of tests, including a treadmill test or a cycling test. By measuring your VO2 max, you can determine your aerobic fitness level and track improvements over time.
Skill Assessment Techniques
In addition to fitness level, it’s important to assess your skills as a cyclist. This can include assessing your balance, coordination, and pedaling technique. One way to assess your balance is to ride a bike on a balance trainer or to perform exercises such as standing on one leg while pedaling. Coordination can be assessed by performing tasks such as weaving through cones or performing figure-eight patterns. Pedaling technique can be assessed by analyzing your pedal stroke and identifying any areas for improvement.
Examples of Fitness and Skill Assessments
Here are some examples of fitness and skill assessments that you can use to determine your current level of fitness and skill as a cyclist:
- A one-mile time trial to assess your aerobic fitness level and measure improvements over time.
- A hill climb to assess your anaerobic fitness level and determine your power-to-weight ratio.
- A 30-second sprint to assess your maximum effort and measure improvements in speed.
- A cyclocross course to assess your skills in technical terrain and assess your overall fitness level.
By using these fitness and skill assessment techniques, you can develop a customized training plan that is tailored to your individual needs and goals. Whether you’re a beginner or an experienced cyclist, it’s important to regularly assess your fitness level and skills to ensure that you’re making progress and improving over time.
Customizing Your Training Plan
Importance of customization
Customizing your training plan is crucial for achieving a perfect bike fit. It allows you to focus on your specific needs and goals, which can lead to better results and fewer injuries. By tailoring your training to your individual needs, you can ensure that you are making the most of your time and effort.
Factors to consider when customizing a training plan
When customizing your training plan, there are several factors to consider. These include your fitness level, cycling experience, available time and resources, and personal goals. It’s important to be realistic about your goals and to take into account any limitations or restrictions you may have.
Tips for customizing a training plan
Here are some tips for customizing your training plan:
- Start with a base fitness level assessment to determine your current fitness level and identify areas for improvement.
- Incorporate a variety of training techniques, such as endurance rides, interval training, and strength training, to develop a well-rounded fitness program.
- Include rest days and recovery time in your training plan to allow your body to recover and avoid overtraining.
- Gradually increase the intensity and duration of your training over time to avoid injury and ensure steady progress.
- Be flexible and willing to adjust your training plan as needed based on your progress and changing circumstances.
Incorporating Strength Training and Stretching
Importance of strength training and stretching
Before embarking on any bike fitness program, it is essential to understand the importance of strength training and stretching. Strength training helps to build muscle and increase muscular endurance, which are crucial for cycling. It also helps to improve overall body strength, which can help with climbing hills and tackling headwinds. Stretching, on the other hand, helps to improve flexibility and range of motion, which can help to prevent injury and improve cycling performance.
Exercises to improve bike fitness
There are several exercises that can be incorporated into a strength training routine to improve bike fitness. These include:
- Squats: These help to build leg strength and improve pedaling efficiency.
- Lunges: These target the legs and glutes, improving overall power and endurance.
- Planks: These help to build core strength, which is essential for maintaining good posture while cycling.
- Push-ups: These help to build upper body strength, which can help with climbing hills and tackling headwinds.
Sample strength training and stretching routines
Here is a sample strength training routine that can be done twice a week:
- Warm up with 5-10 minutes of light cardio, such as jogging or cycling.
- Do 3 sets of 10-12 reps of each exercise, resting for 30-60 seconds between sets.
- Cool down with 5-10 minutes of stretching, focusing on the major muscle groups used in cycling, such as the legs, glutes, and back.
Here is a sample stretching routine that can be done daily:
- Start with 5-10 minutes of light cardio to warm up the muscles.
- Hold each stretch for 15-30 seconds, breathing deeply and relaxing into the stretch.
- Focus on the major muscle groups used in cycling, such as the hamstrings, quadriceps, and calves.
- End with 5-10 minutes of relaxation, focusing on deep breathing and relaxation techniques.
Incorporating Endurance Training
Endurance training is a crucial aspect of any comprehensive cycling training program. It involves building up the body’s ability to sustain physical activity for an extended period. This type of training is particularly important for individuals who participate in long-distance cycling events or those who simply want to improve their overall fitness level.
The following are some of the exercises that can be incorporated into an endurance training routine:
- Interval training: This involves alternating between periods of high-intensity exercise and periods of rest or low-intensity exercise. For example, a cyclist might pedal as fast as possible for one minute, then rest for two minutes before repeating the process.
- Hill climbs: Cycling up steep hills can help build leg strength and improve cardiovascular fitness. It can also help a cyclist develop the ability to maintain a high level of intensity for an extended period.
- Long distance rides: Long distance rides are an excellent way to build endurance. A cyclist might start with a shorter ride and gradually increase the distance over time.
Here is a sample endurance training routine:
- Warm-up: 10-15 minutes of easy pedaling
- Interval training: 20 minutes of high-intensity exercise followed by 10 minutes of rest
- Hill climbs: 3 sets of 10 minutes of pedaling up a steep hill
- Cool down: 10-15 minutes of easy pedaling
By incorporating endurance training into a cycling training program, individuals can improve their overall fitness level, build leg strength, and develop the ability to sustain physical activity for an extended period.
Implementing the Training Plan
Monitoring Progress
Monitoring progress is an essential aspect of achieving a perfect bike fit in just three weeks. It helps you to evaluate the effectiveness of your training plan and make any necessary adjustments to ensure that you reach your goals. Here are some tips for monitoring progress:
Importance of monitoring progress
Monitoring progress is crucial because it allows you to track your improvement over time. By keeping a record of your progress, you can identify areas where you need to focus your attention and make adjustments to your training plan as necessary. Additionally, monitoring progress can help you to stay motivated by providing tangible evidence of your progress.
Tips for monitoring progress
Here are some tips for monitoring progress:
- Keep a training log: A training log is a record of your training sessions, including the distance, duration, and intensity of each session. Keeping a training log can help you to track your progress over time and identify patterns in your training.
- Use bike fit metrics: Bike fit metrics, such as saddle height, handlebar width, and crank length, can provide valuable information about your bike fit. By monitoring these metrics over time, you can track your progress and make adjustments to your training plan as necessary.
- Take body measurements: Taking body measurements, such as waist circumference and inseam length, can provide valuable information about your body composition and help you to track your progress.
- Use power meters: Power meters can provide valuable information about your training intensity and can help you to track your progress over time.
Examples of progress monitoring techniques
Here are some examples of progress monitoring techniques:
- Comparing training logs: By comparing your training logs from week to week, you can track your progress and identify areas where you need to focus your attention.
- Using bike fit software: Bike fit software, such as Retül or Fit3D, can provide detailed information about your bike fit and help you to track your progress over time.
- Measuring body composition: Measuring your body composition, such as your body mass index (BMI) or lean body mass, can provide valuable information about your progress and help you to identify areas where you need to focus your attention.
- Analyzing power data: Analyzing your power data, such as average power or functional threshold power (FTP), can provide valuable information about your training intensity and help you to track your progress over time.
Making Adjustments to the Training Plan
Importance of making adjustments
As you progress through the training plan, it is essential to make adjustments to ensure that you continue to improve your bike fit. These adjustments may involve modifying your technique, adjusting your equipment, or modifying your training plan.
Tips for making adjustments
To make effective adjustments to your training plan, follow these tips:
- Monitor your progress regularly.
- Seek feedback from a coach or trainer.
- Listen to your body and make adjustments based on how you feel.
- Be flexible and willing to try new techniques or equipment.
Examples of adjustments to the training plan
Here are some examples of adjustments you may need to make to your training plan:
- Increase or decrease the intensity of your workouts.
- Modify your technique to accommodate any changes in your body or equipment.
- Add or remove exercises from your training plan based on your progress.
- Adjust your training schedule to accommodate any changes in your work or personal life.
Remember, the key to achieving a perfect bike fit is to be patient, consistent, and willing to make adjustments as needed. By following the training plan and making adjustments as necessary, you can achieve a perfect bike fit in just three weeks.
Staying Motivated
Importance of Staying Motivated
Achieving a perfect bike fit requires dedication and consistent effort. Maintaining motivation is crucial to ensuring that you stick to the training plan and make progress towards your goal. Without motivation, it’s easy to skip workouts, become complacent, or make excuses to avoid training. Therefore, staying motivated is essential to achieving a perfect bike fit in just three weeks.
Tips for Staying Motivated
- Set clear goals: Define your goals and make them specific, measurable, achievable, relevant, and time-bound (SMART). Having clear goals can help you stay focused and motivated.
- Create a schedule: Plan your training sessions in advance and create a schedule that you can stick to. This will help you stay organized and make the most of your time.
- Find a training partner: Working out with a partner can be more enjoyable and motivating. You can also hold each other accountable and push each other to work harder.
- Reward yourself: Celebrate your progress and achievements along the way. This can help you stay motivated and feel a sense of accomplishment.
- Focus on the benefits: Remind yourself of the benefits of achieving a perfect bike fit, such as improved performance, reduced risk of injury, and increased enjoyment of cycling.
Examples of Motivational Techniques
- Positive self-talk: Encourage yourself and focus on your strengths. Use positive affirmations to build confidence and motivation.
- Visualization: Imagine yourself achieving your goals and visualize the positive outcomes. This can help you stay focused and motivated.
- Music: Listen to music that motivates and inspires you during your workouts. This can help you get in the zone and stay motivated.
- Goal tracking: Track your progress and celebrate your achievements. This can help you stay motivated and see how far you’ve come.
- Surround yourself with positive influences: Surround yourself with people who support and encourage you. This can help you stay motivated and build a positive mindset.
Integrating Rest and Recovery
Integrating rest and recovery is an essential aspect of any training plan, particularly when trying to achieve a perfect bike fit in just three weeks. The importance of rest and recovery cannot be overstated, as it allows the body to repair and rebuild muscle tissue, reduce inflammation, and prevent overtraining. In this section, we will discuss the tips for integrating rest and recovery into your training plan and provide examples of rest and recovery techniques.
Importance of Rest and Recovery
Rest and recovery are crucial for optimal performance and injury prevention. When we exercise, we create micro-tears in our muscles, which the body repairs during the recovery process. Rest and recovery allow the body to repair and rebuild muscle tissue, improve muscle strength and endurance, and prevent overtraining. Additionally, rest and recovery help to reduce inflammation, which can lead to injuries if left unchecked.
Tips for Integrating Rest and Recovery
- Schedule rest days: Plan your training schedule to include rest days, allowing your body to recover and rebuild. It is recommended to have at least one rest day per week.
- Incorporate active recovery: Active recovery techniques, such as yoga or light exercise, can help to reduce muscle soreness and improve circulation.
- Get adequate sleep: Sleep is crucial for recovery, and it is recommended to get at least 7-9 hours of sleep per night.
- Stay hydrated: Proper hydration is essential for recovery, and it is recommended to drink at least 8-10 glasses of water per day.
- Listen to your body: Pay attention to your body’s signals and adjust your training plan accordingly. If you feel fatigued or injured, take a break and seek medical attention if necessary.
Examples of Rest and Recovery Techniques
- Active recovery: Techniques such as yoga, foam rolling, or light exercise can help to reduce muscle soreness and improve circulation.
- Massage: Professional massage can help to reduce muscle tension and promote relaxation.
- Meditation: Mindfulness meditation can help to reduce stress and promote relaxation.
- Foam rolling: Self-massage with a foam roller can help to release tension in the muscles and improve circulation.
- Sleep: Adequate sleep is essential for recovery and can help to reduce muscle soreness and improve overall performance.
Evaluating Progress and Making Refinements
Assessing Your Progress
Assessing your progress is a crucial step in achieving a perfect bike fit. It allows you to track your progress, identify areas that need improvement, and make adjustments to your training program. Here are some tips for assessing your progress:
- Use a bike fit assessment checklist: A bike fit assessment checklist can help you evaluate your progress by comparing your current bike fit to your initial assessment. The checklist should include measurements such as saddle height, handlebar height, and cleat position.
- Keep a training log: A training log can help you track your progress by recording your training sessions, including distance, time, and power output. This data can be used to identify trends and patterns in your training, and to make adjustments to your training program.
- Get feedback from a coach or trainer: A coach or trainer can provide valuable feedback on your progress, including areas that need improvement and areas where you are excelling. They can also provide guidance on how to make adjustments to your training program to achieve a perfect bike fit.
- Use biomechanical analysis software: Biomechanical analysis software can provide detailed feedback on your biomechanics, including body position, pedal stroke, and muscle activation. This data can be used to identify areas that need improvement and to make adjustments to your training program.
By using these tips, you can effectively assess your progress and make refinements to your training program to achieve a perfect bike fit in just 3 weeks.
Making Refinements to the Training Plan
Making refinements to the training plan is an essential part of achieving a perfect bike fit in just three weeks. This involves adjusting the plan to accommodate any changes in the rider’s body or goals, as well as making small modifications to ensure optimal performance.
Importance of making refinements
Making refinements to the training plan is crucial for achieving a perfect bike fit because it allows the rider to respond to their body’s changing needs. As the body adapts to the training, it may require different types or amounts of exercise to continue progressing. By making refinements to the plan, the rider can ensure that they are continually challenging themselves and making progress towards their goals.
Tips for making refinements
Here are some tips for making refinements to the training plan:
- Monitor progress regularly: To make effective refinements to the training plan, it is essential to monitor progress regularly. This can be done by keeping a training log or using a fitness tracking app.
- Be flexible: Be prepared to make changes to the plan if necessary. For example, if the rider is experiencing discomfort or pain, it may be necessary to adjust the training schedule or intensity.
- Listen to the body: The body will provide clues about what is working and what is not. If the rider is feeling fatigued or struggling to complete workouts, it may be necessary to adjust the plan accordingly.
- Seek professional advice: If the rider is unsure about how to make refinements to the training plan, they should seek professional advice from a coach or trainer.
Examples of refinements to the training plan
Here are some examples of refinements that may be necessary:
- Increasing the intensity of workouts: If the rider is consistently performing workouts at a high level, it may be necessary to increase the intensity to continue making progress.
- Changing the type of exercise: If the rider is no longer seeing progress from a particular type of exercise, it may be necessary to switch to a different type of exercise.
- Adjusting the training schedule: If the rider is experiencing discomfort or pain, it may be necessary to adjust the training schedule to allow for more rest days.
- Incorporating strength training: If the rider is primarily focused on endurance, it may be necessary to incorporate strength training to improve overall fitness and prevent injury.
By making refinements to the training plan, the rider can ensure that they are continually challenging themselves and making progress towards their goals. This is an essential part of achieving a perfect bike fit in just three weeks.
Setting New Goals
Setting new goals is a crucial aspect of achieving a perfect bike fit. It helps you to maintain focus and motivation, as well as providing a sense of progression and achievement. By setting new goals, you can measure your progress and adjust your training program accordingly. Here are some tips for setting new goals:
- Make them specific: Your goals should be specific and measurable. For example, instead of saying “I want to improve my bike fit,” say “I want to increase my saddle height by 2cm in the next 3 weeks.”
- Make them challenging but achievable: Your goals should be challenging but achievable. Setting goals that are too easy will not provide enough motivation, while setting goals that are too difficult may lead to frustration and burnout.
- Write them down: Writing down your goals makes them more tangible and helps to keep you accountable. You can place your goals in a visible location, such as on your bike or computer screen, to remind you of what you are working towards.
- Set a deadline: Setting a deadline for your goals gives you a sense of urgency and helps to keep you focused. Make sure your deadline is realistic and achievable.
- Celebrate your successes: Celebrating your successes, no matter how small, helps to reinforce positive behavior and motivates you to continue working towards your goals.
Here are some examples of new goals for bike fit improvement:
- Increase saddle height by 2cm in the next 3 weeks
- Improve leg extension range of motion by 10 degrees in the next 4 weeks
- Reduce handlebar drop by 1cm in the next 2 weeks
- Increase pedal stroke efficiency by 5% in the next 3 weeks
- Improve bike fit for long distance rides by reducing numbness and discomfort in the hands and feet in the next 4 weeks.
Celebrating Success
- Importance of celebrating success
- Boosts motivation and confidence
- Encourages continuous improvement
- Fosters positive attitude towards the fitness journey
- Tips for celebrating success
- Set achievable milestones
- Find a support system to share the milestone with
- Reward yourself with something that aligns with your fitness goals
- Document your progress through photos or videos
- Reflect on your journey and acknowledge your efforts
- Examples of success celebration techniques
- Sharing achievements on social media
- Going for a bike ride to a favorite destination
- Treating yourself to a new cycling accessory
- Planning a family outing or vacation
- Joining a cycling club or group ride to celebrate
FAQs
1. How important is a proper bike fit?
A proper bike fit is crucial for ensuring comfort, efficiency, and preventing injuries while cycling. It helps to align your body in the optimal position to reduce strain on your back, neck, and other parts of your body. Additionally, a proper bike fit can also improve your performance and speed by reducing wind resistance and increasing power output.
2. What are the benefits of achieving a perfect bike fit in just 3 weeks?
Achieving a perfect bike fit in just 3 weeks can provide several benefits, including improved comfort, reduced risk of injury, and increased performance. By making small adjustments to your bike position, you can reduce the strain on your body and improve your overall cycling experience. Additionally, a proper bike fit can also help you to achieve your cycling goals faster and more efficiently.
3. What are the common signs of an improper bike fit?
Common signs of an improper bike fit include discomfort or pain in your neck, back, or other parts of your body, numbness or tingling in your hands or feet, and difficulty maintaining a consistent pedal stroke. Additionally, an improper bike fit can also affect your performance and make it difficult to achieve your cycling goals.
4. What are the factors that affect a proper bike fit?
Several factors can affect a proper bike fit, including your body dimensions, riding style, and the type of bike you are using. Additionally, other factors such as your flexibility, strength, and cycling goals can also play a role in determining the optimal bike fit for you.
5. How often should I have my bike fit checked?
It is recommended to have your bike fit checked every 6-12 months, or whenever you experience any discomfort or pain while cycling. Additionally, if you make any changes to your bike, such as upgrading to a new bike or changing your handlebars, it is important to have your bike fit checked again to ensure that you are in the optimal position.
6. How long does it take to achieve a perfect bike fit?
Achieving a perfect bike fit can take anywhere from a few days to several weeks, depending on your body and the adjustments that need to be made. In general, it is recommended to allow at least 3-4 weeks for achieving a proper bike fit, especially if you are starting from scratch. However, with the right guidance and expertise, it is possible to achieve a perfect bike fit in just 3 weeks.
7. What are the common mistakes to avoid when achieving a perfect bike fit?
Common mistakes to avoid when achieving a perfect bike fit include neglecting to consider your body dimensions, relying solely on online guides, and not seeking professional advice. Additionally, failing to make gradual adjustments and rushing the process can also lead to improper bike fit and discomfort while cycling.
8. How can I improve my cycling performance with a proper bike fit?
A proper bike fit can improve your cycling performance by reducing wind resistance, increasing power output, and improving your overall efficiency. Additionally, a proper bike fit can also help you to maintain a consistent pedal stroke, reduce strain on your body, and improve your comfort while cycling. All of these factors can contribute to improved performance and help you to achieve your cycling goals faster.